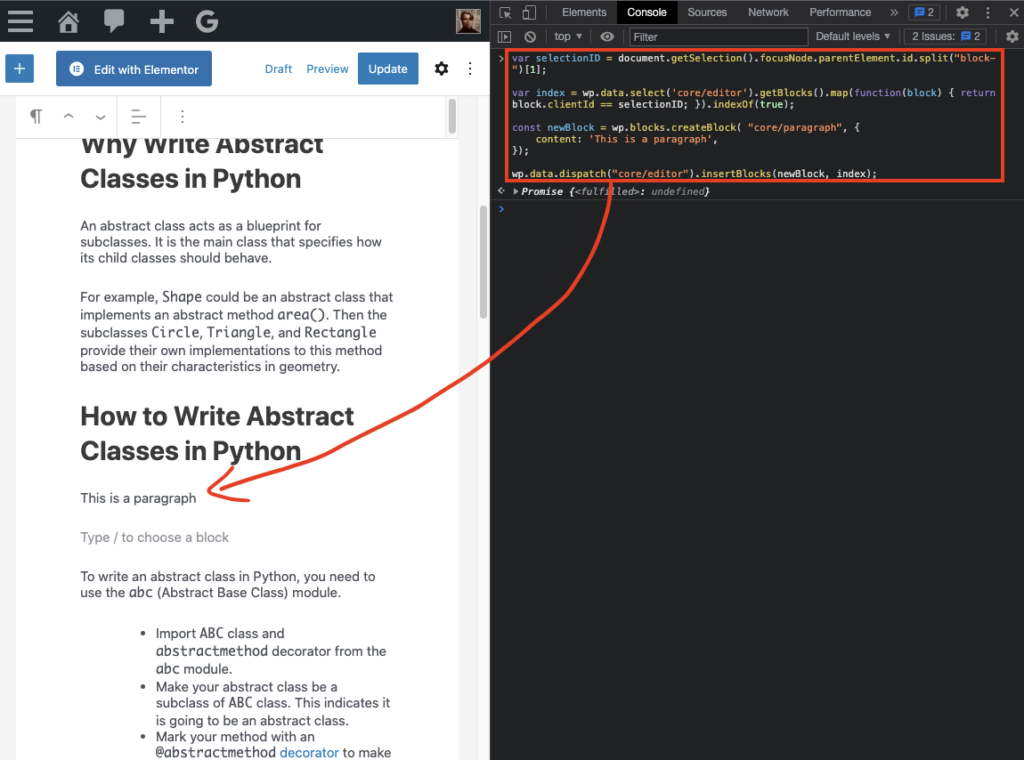
To add a reusable Gutenberg block to the desired location in a WordPress post using JavaScript:
- Select a block.
- Get the ID of the selected block.
- Find the index of the selected block with the ID.
- Insert the new block at the index.
For example, to add a paragraph in a blog post using JavaScript, run this piece of code:
var selectionID = document.getSelection().focusNode.parentElement.id.split("block-")[1];

var index = wp.data.select('core/editor').getBlocks().map(function(block) { return block.clientId == selectionID; }).indexOf(true) + 1;

const newBlock = wp.blocks.createBlock( "core/paragraph", {
    content: 'This is a paragraph',
});

wp.data.dispatch("core/editor").insertBlocks(newBlock, index);
This example adds a new paragraph below any block you have selected in the post editor in WordPress.

Detailed Description
You may know you can use JavaScript to add reusable blocks to the Gutenberg editor in WordPress.
For example, to programmatically add a new paragraph to your post, you can run the following JavaScript code:
const newBlock = wp.blocks.createBlock("core/paragraph", {
    content: 'This is a paragraph',
});

wp.data.dispatch("core/editor").insertBlocks(newBlock);
But this piece of code adds the new paragraph at the very end of the post. This may not be what you want. Instead, you probably want to be able to insert the block at any selected location in the post.
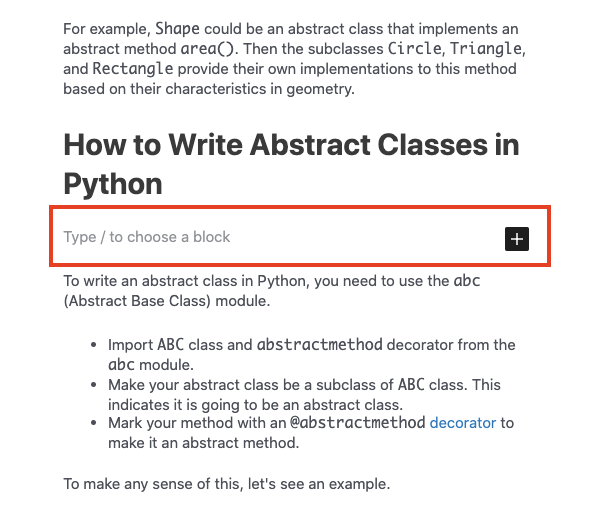
For example, it could be handy if you select a block as illustrated below, and embed a new block right there.


Let me show you how to do it.
How to Insert a Block Anywhere in the Post
To insert the block anywhere in the post (on any selected block), specify the index at which you want to add it. This happens by adding a second parameter to the insertBlocks() method.
But how do you know the index of the current selection?
1. Select Any Block in the WordPress Gutenberg Editor
Open up a post you are editing with the Gutenberg editor.
Activate any block by clicking on it. This can also be an empty new block that says Type / to choose a block
2. Get the ID of the Selected Block Element
First, get the ID of the block you have selected. Here is one way you can do it. (This picks the ID of the HTML element of the selected block.)
var selectionID = document.getSelection().focusNode.parentElement.id.split("block-")[1];
3. Get the Index of the Selection
Access all the blocks in the post and figure out the index of your selected block. You can do this with the ID you figured out in the previous step:
var index = wp.data.select('core/editor').getBlocks().map(function(block) { return block.clientId == selectionID; }).indexOf(true) + 1;
Now you know the index of the block you have selected.
4. Insert the Block at the Index After the Selection
Next, insert the block at the index after the selection. To do this, pass it as a second parameter to the insertBlocks() method:
const newBlock = wp.blocks.createBlock( "core/paragraph", {
    content: 'This is a paragraph',
});

wp.data.dispatch("core/editor").insertBlocks(newBlock, index);
And that’s it!
Full Code
Here is the full code for your convenience:
var selectionID = document.getSelection().focusNode.parentElement.id.split("block-")[1];

var index = wp.data.select('core/editor').getBlocks().map(function(block) { return block.clientId == selectionID; }).indexOf(true) + 1;

const newBlock = wp.blocks.createBlock( "core/paragraph", {
    content: 'This is a paragraph',
});

wp.data.dispatch("core/editor").insertBlocks(newBlock, index);
Test It in the JavaScript Console
Feel free to try it out by:
- Opening a JavaScript console on a post you are editing
- Select any block with your mouse.
- Run the above code in the console
- See a new paragraph appear below the selection.

